Mastering the breakout is a critical element of a teams overall success throughout the season. Teams who can successfully execute a breakout spend less time in the defensive zone, burn less energy re-grouping from a defensive zone turnover, and can create more chances if they can navigate the neutral zone.
Keys to a Successful Breakout in Hockey
There are four major keys to a successful breakout in hockey:
- Puck Possession
- Wing Positioning
- Center Support
- Owning The Majority
Puck Possession
The first key to a successful hockey breakout is by getting possession of the puck. Without it, breaking the puck out of the defensive zone is tough. While a successful breakout can technically happen through errors at the blue line of the team, the scramble that ensues for the puck is not an organized breakout.
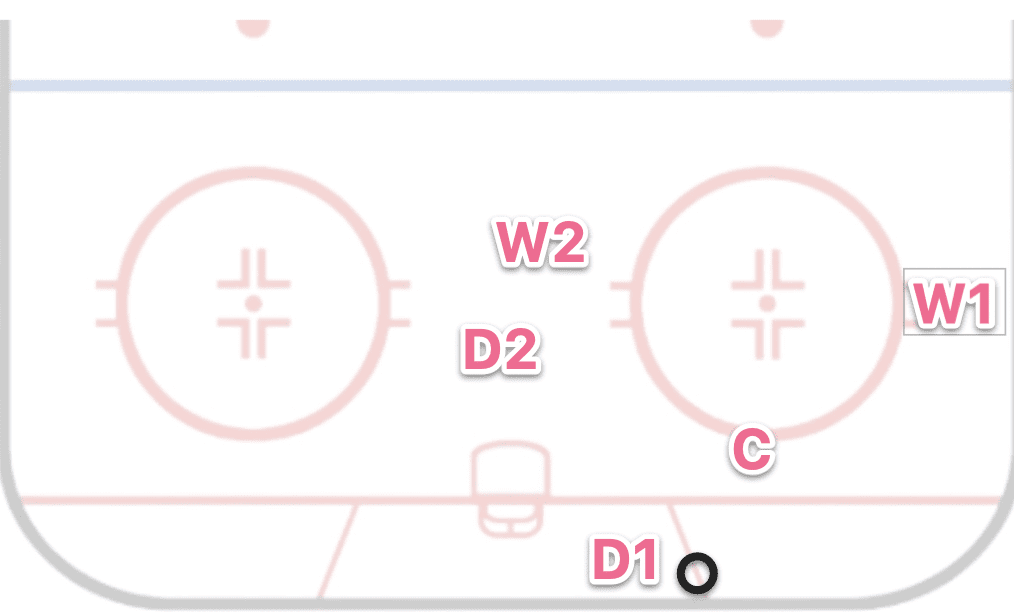
In the image below, we see an example of how a breakout typically begins in hockey. Most commonly, a loose puck is captured by a defenseman. In this case, the defenseman has taken control of the puck below their own goal line.
From this point, they have a few options:
- Immediately pass to W1, the strong side wing / forward.
- Pass the puck to “C”, the center, in this case
- Hold the puck, or reverse it’s direction to his defensive partner.
A great choice here is a quick pass to W1, the supporting wing. This is a great decision because of a few factors, most notably, it’s not in a high danger scoring area. This first pass is the most likely to be intercepted off by an opposing team.
Wing Positioning
In the image above, our wingers are down by the circle hash marks. While this is good wing positioning and a very likely scenario, it’s not the best case scenario. This is because, in the graphic shown above, the opposing teams defensemen do not have to respect any chance of a quick zone exit. They are much more likely to pinch down, forcing a defensive zone turnover.
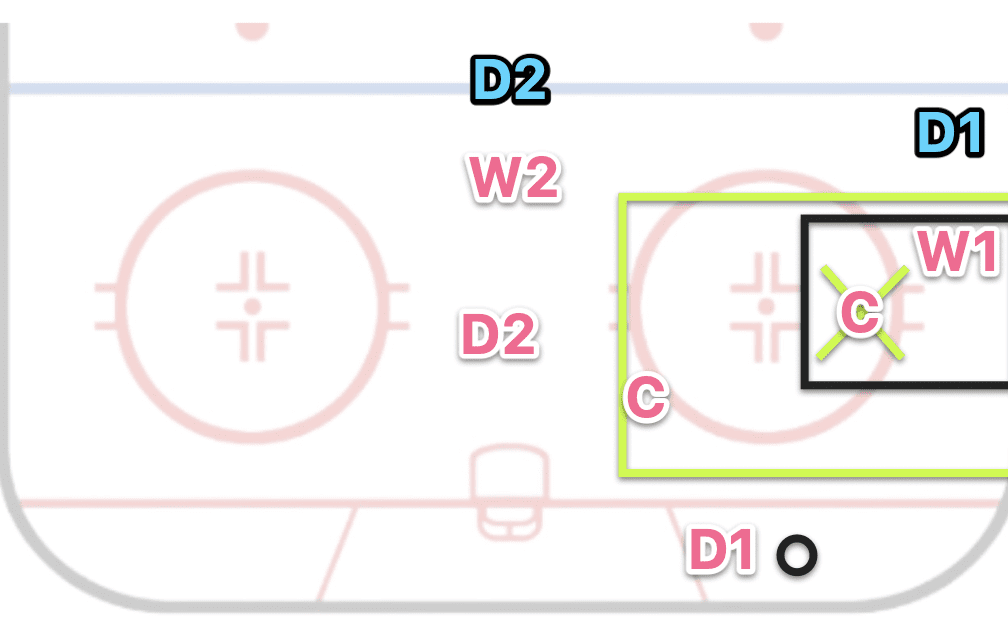
In the graphic below, we can clearly see that because of the low position inside the zone our strong side wing (W1) has, the opposing teams defenseman has the luxury of pinching down for the chance at disrupting this breakout.
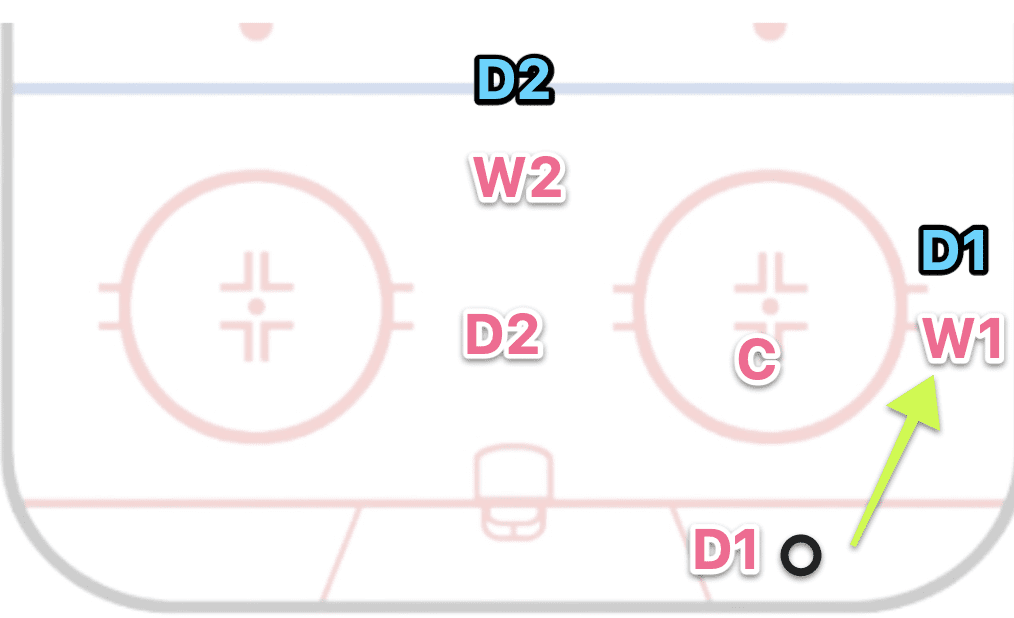
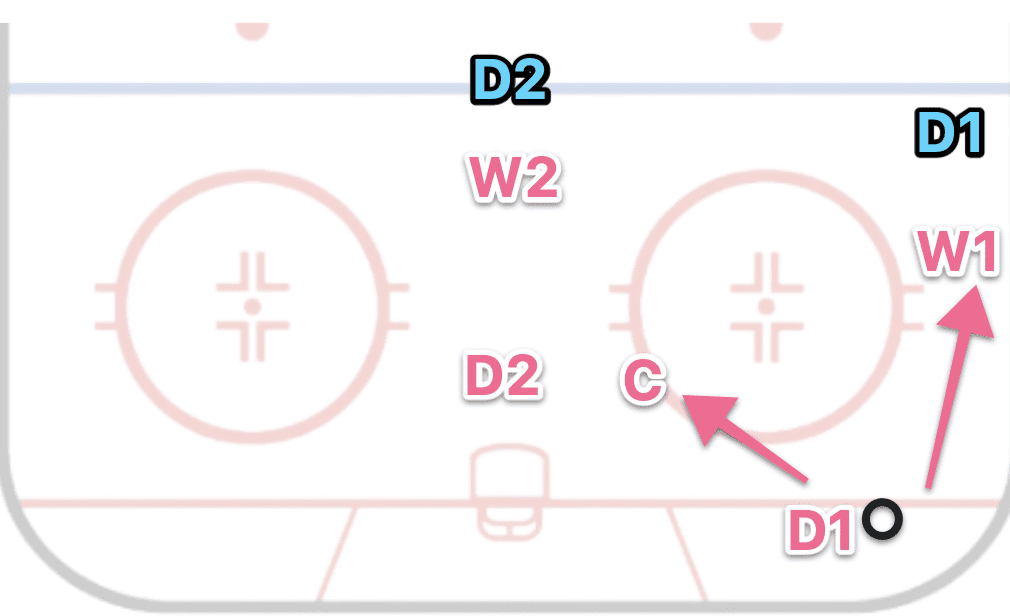
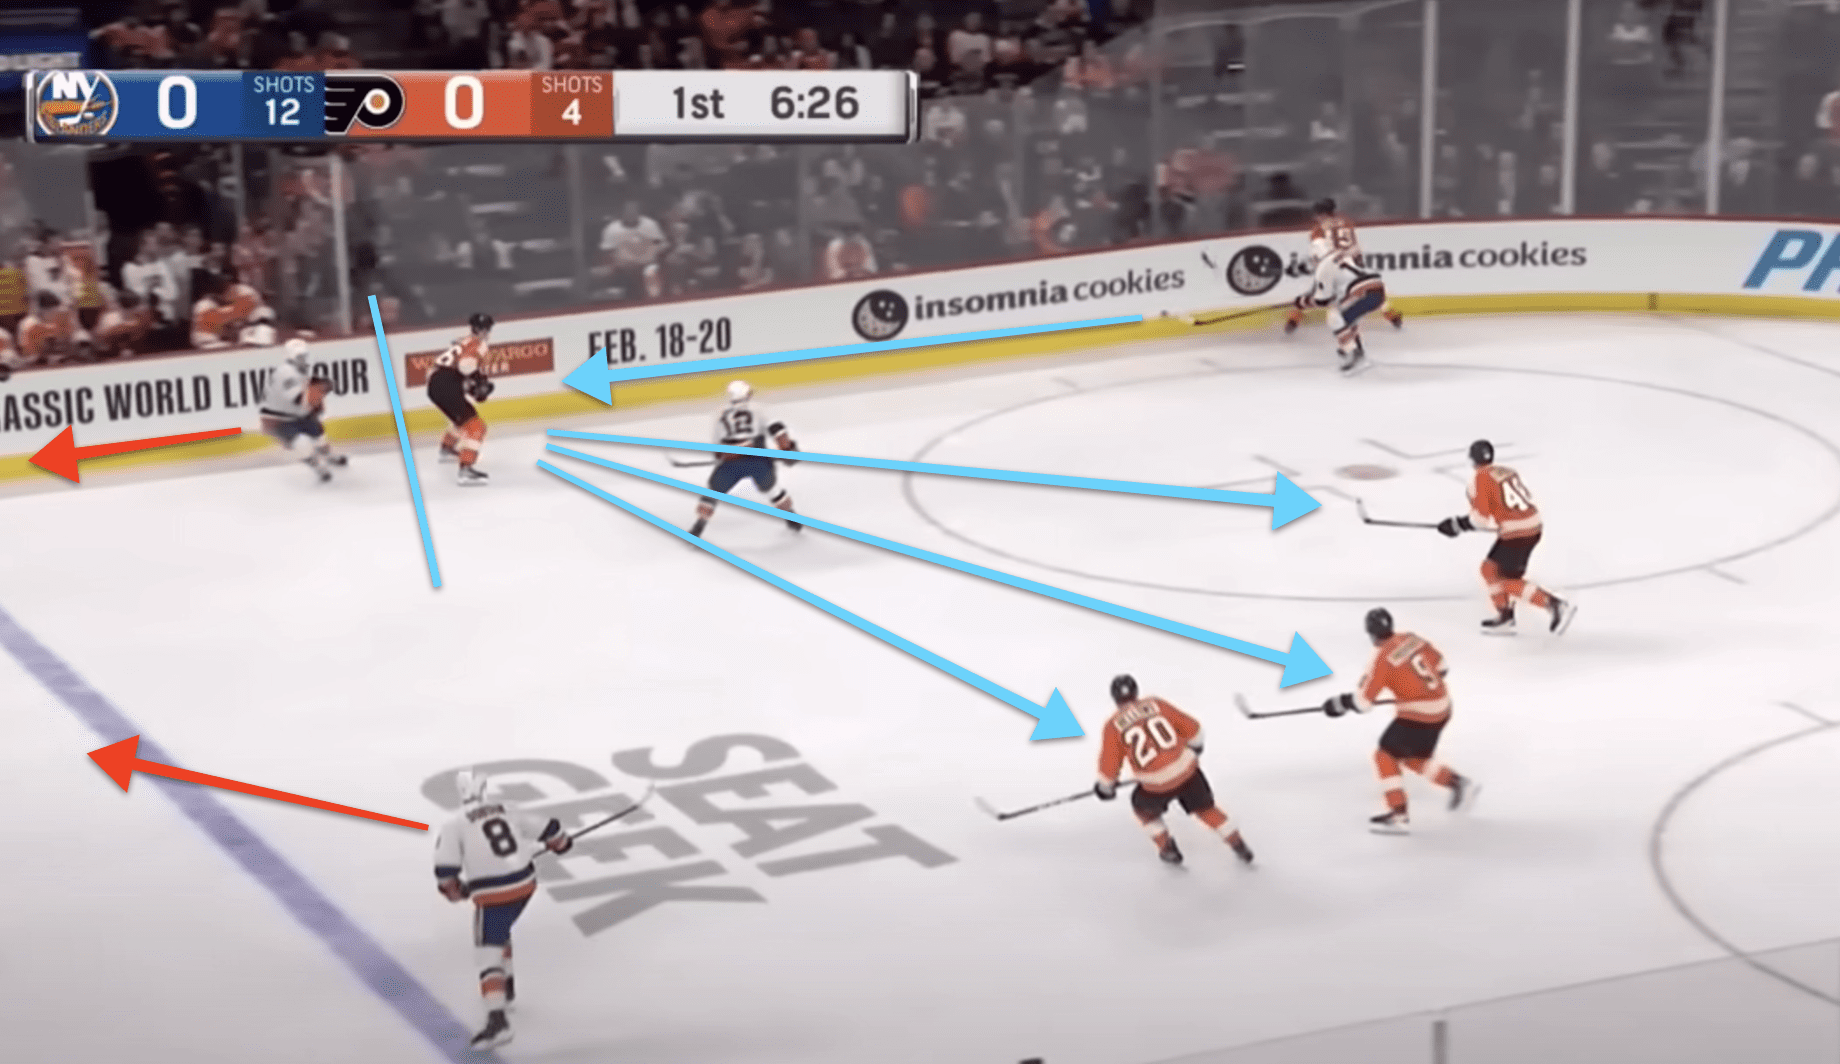
Below, we demonstrate a much more favorable breakout position for the team trying to exit their defensive zone. In this scenario, our wings have started to exit the zone, without the puck. As a result, we have immediately created more space both inside the zone, as well as for our supporting center.
While our defenseman with the puck has to make a much longer pass, by gaining depth in the zone, our wings have forced pressure outside the zone. In the event of a failed pass, the odds that the puck exits the zone are greater in this situation. Should our wing fail to catch the pass and the puck exits the zone, the opposing team will have to successfully navigate the neutral zone and re-enter for a forecheck.
Gone are the days of forwards waiting to catch a breakout pass before moving. Teams that do not move prior to this pass face a much higher likelihood of failing their breakout attempt than those that move to open the ice.
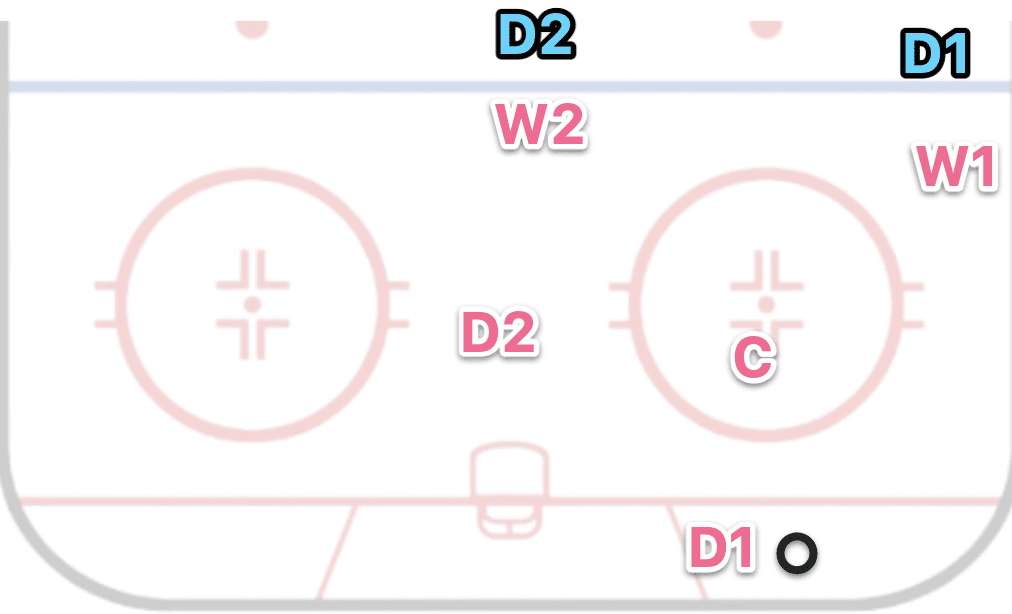
One additional critical piece of advice for a successful hockey breakout is the direction in which your forwards face when breaking the puck out of the zone. If the other team has opted to change lines, forwards should be skating up the ice as hard as possible. In the more likely scenario that the opposing team has not changed and is still providing pressure, wingers who face your own teams puck carrier create a natural barrier between opposing team defensemen.
The entire point of a breakout is to leave the zone, with the puck. Below, we show a successful breakout orchestrated by the Dallas Stars, where a forward has his back to the opposing teams defenseman, who cannot make a play on the puck.
Center Support
As a center, your job is to support defensemen while in the defensive zone. Once control of the puck has been gained, your role shifts from defensive support to a critical role in the breakout process. There are two key elements to proper center support in a breakout.
- Create space through gap control
- Offer an outlet pass to defensemen and wing
A common error for supporting centers during the breakout is misunderstanding proper gap control. Remember, you are now facing the play. There is no reason to be within inches of your strong side winger. Centers offer the best support when they maintain a proper distance from the strong side wing, as well as keeping an option open for the defenseman with the puck.
When the center can maintain good gap control, they provide an outlet pass to their defensive player who currently holds the puck.
From here, the defenseman should complete a pass to W1. W1 now has the option to either exit the zone immediately, or to complete a pass to the center who is in a supporting position.
Owning The Majority
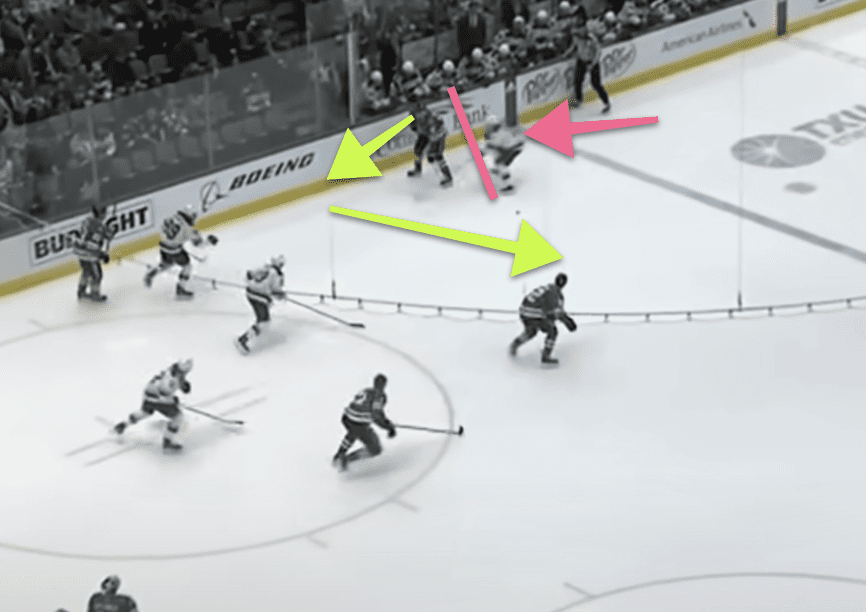
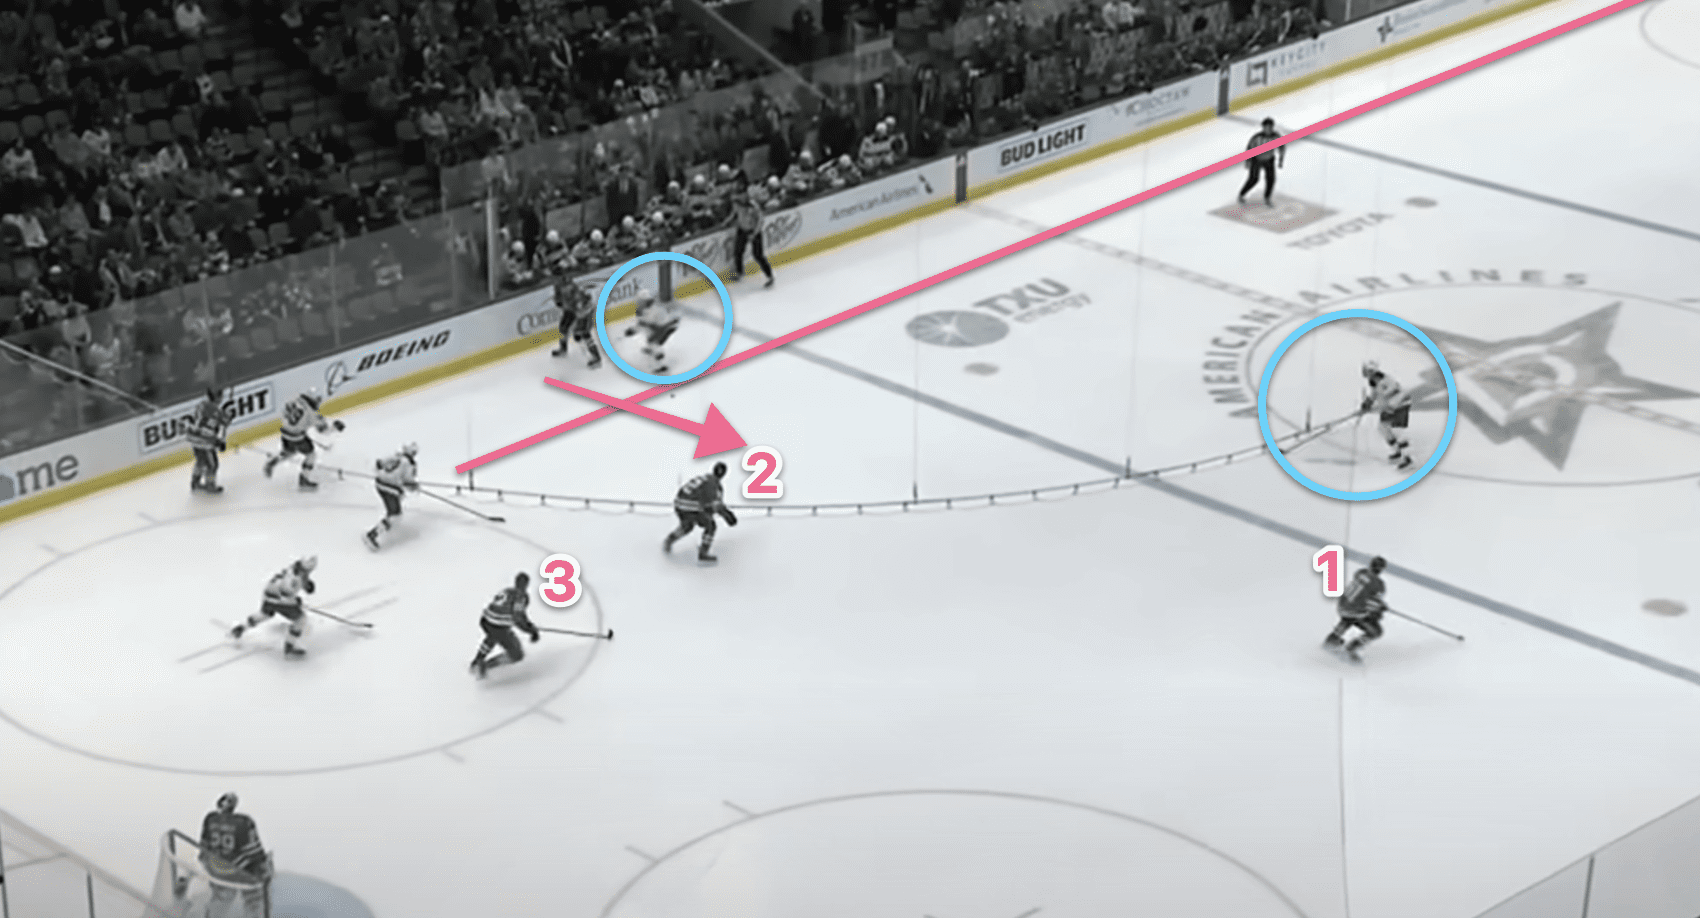
Owning the majority refers to the center of the ice surface. Along the boards, there is less room to navigate. Take a look at the graphic below. Once the puck crosses the pink line, the Stars now own the majority of the ice. As a result, an odd man rush is created. While there is a back checking Wild player, they’re already behind the play.
Consider the fact that the opposing teams back checking players were just aggressively forechecking, by gaining the center of the ice or owning the majority, your team has put opponents at a serious disadvantage!
Let’s take a look at this play developing in the video below.
As demonstrated above, once the majority of the ice is owned, open space is freely available. Of course, it’s now on your team to get a successful forecheck going, or to create a scoring opportunity directly off the rush. Congratulations, you’ve created an odd man rush!
Things To Teach Players For A Better Breakout
- Observe surroundings by “Shoulder Checking”
- Create body position barriers
Observe surroundings by “Shoulder Checking”
One of the single most important things any hockey player can learn to do is to master the shoulder check. A shoulder check is simply a quick look around, over the shoulder. Hence, the term “shoulder check”.
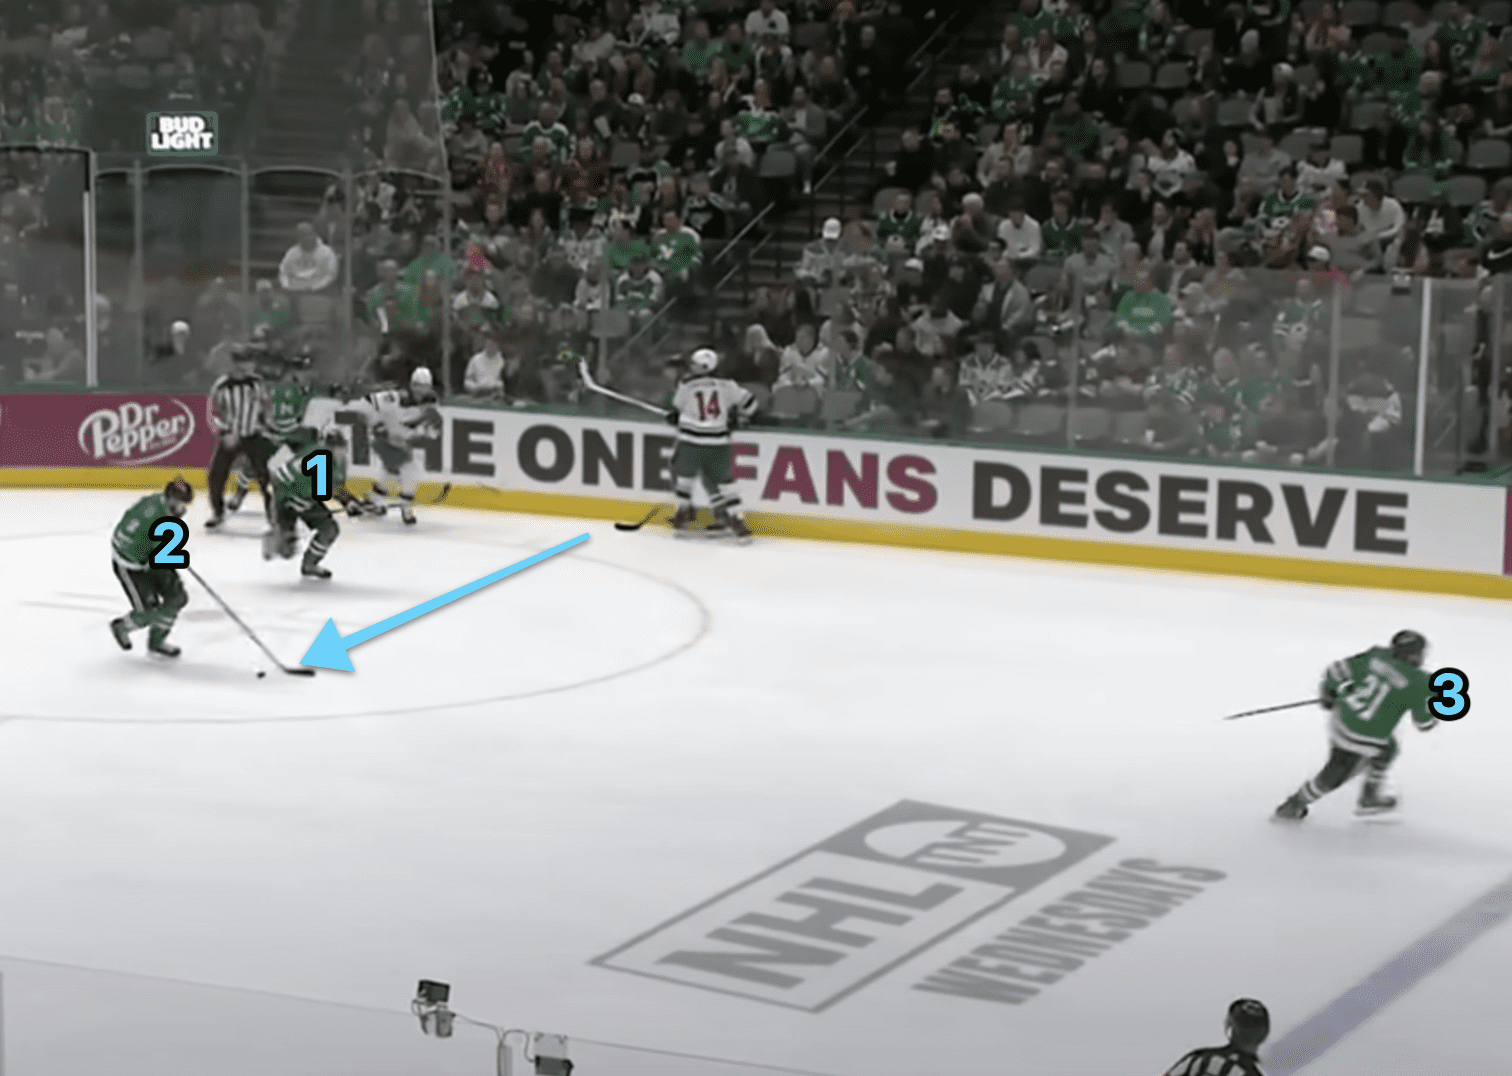
Using the same clip from above, take a look at the strong side forward on the ensuing play. Before his teammate has the puck, while they’re still playing defense, he has already taken a quick glance up ice. He recognizes that the nearest threat is not behind him, but rather coming right at him. As a result of this shoulder check, he is now aware that because there is space behind him, he can safely move this puck to the center of the ice if the Wild’s Joel Erikkson Ek attacks him upon receipt of the puck.

Erikkson Ek puts pressure on the player, who wisely moves it to the center of the ice. From here, the Stars now own the majority and have a 3-2 odd man rush created.
Let’s take a look at the entire play.
As you can see, by simply taking a look, a scoring situation has been created. Many forwards in this situation panic and hold the puck along the boards, move it to the corner, or worse, give it back to the opposing team. Understanding situational hockey and knowing when you are afforded the opportunity to glance around can create major advantages for your team.
Create body position barriers
The current speed of the professional game nearly dictates that forwards face their own zone, versus having their entire bodies facing up the ice. This is by design, to create a natural barrier through proper body position when breaking the puck out of their own zone.
Of course, this doesn’t mean skating backwards up the ice. The most important pass of any breakout is the first one, as this is where gaps and open ice are naturally created. If the first pass is unsuccessful, forwards supporting the breakout now must change direction and resume defensive zone play.
While there are hundreds of minute variations in any successful breakout, the concept remains the same. Utilize well informed passes to create space, forcing the opposing team to re-group by going from offense to defense. A great breakout in hockey should lead to a successful attack through the neutral zone and into the offensive zone.