It’s often said that “battles are won in the trenches”. In the sport of hockey, battles may be fought in the corners but games are won by capitalizing on opportunities and breakdowns in the neutral zone.
What is the Neutral Zone?
The neutral zone is a space directly in the center of the ice hockey rink, between each blue line. The neutral zone encompasses the center ice red line.
One of the reasons that good neutral zone strategy is so important is because of the transition from offense to defense. In the neutral zone, defensemen are often on their heels, having just left the offensive zone. Forwards that were once on the forecheck are now on the back check. A true forecheck does not begin until one team successfully brings their entire team into the offensive zone.
Possessing the puck in the neutral zone is just as dangerous as not possessing it. Poor decision making with the puck can lead to turnovers in the neutral zone, which very often result in an odd man rush the opposite direction. It is because of these critical transitions that mastering the neutral zone in hockey is so critical to a teams success.
What Are The Key Elements of Neutral Zone Strategy in Hockey?
When it comes to the neutral zone, puck possession is everything. Once the puck is captured, players should immediately re-group, preparing for an offensive zone forecheck. Unfortunately, turnovers can quickly turn ugly in this space.
Let’s look at a forecheck gone wrong for the Chicago Blackhawks.
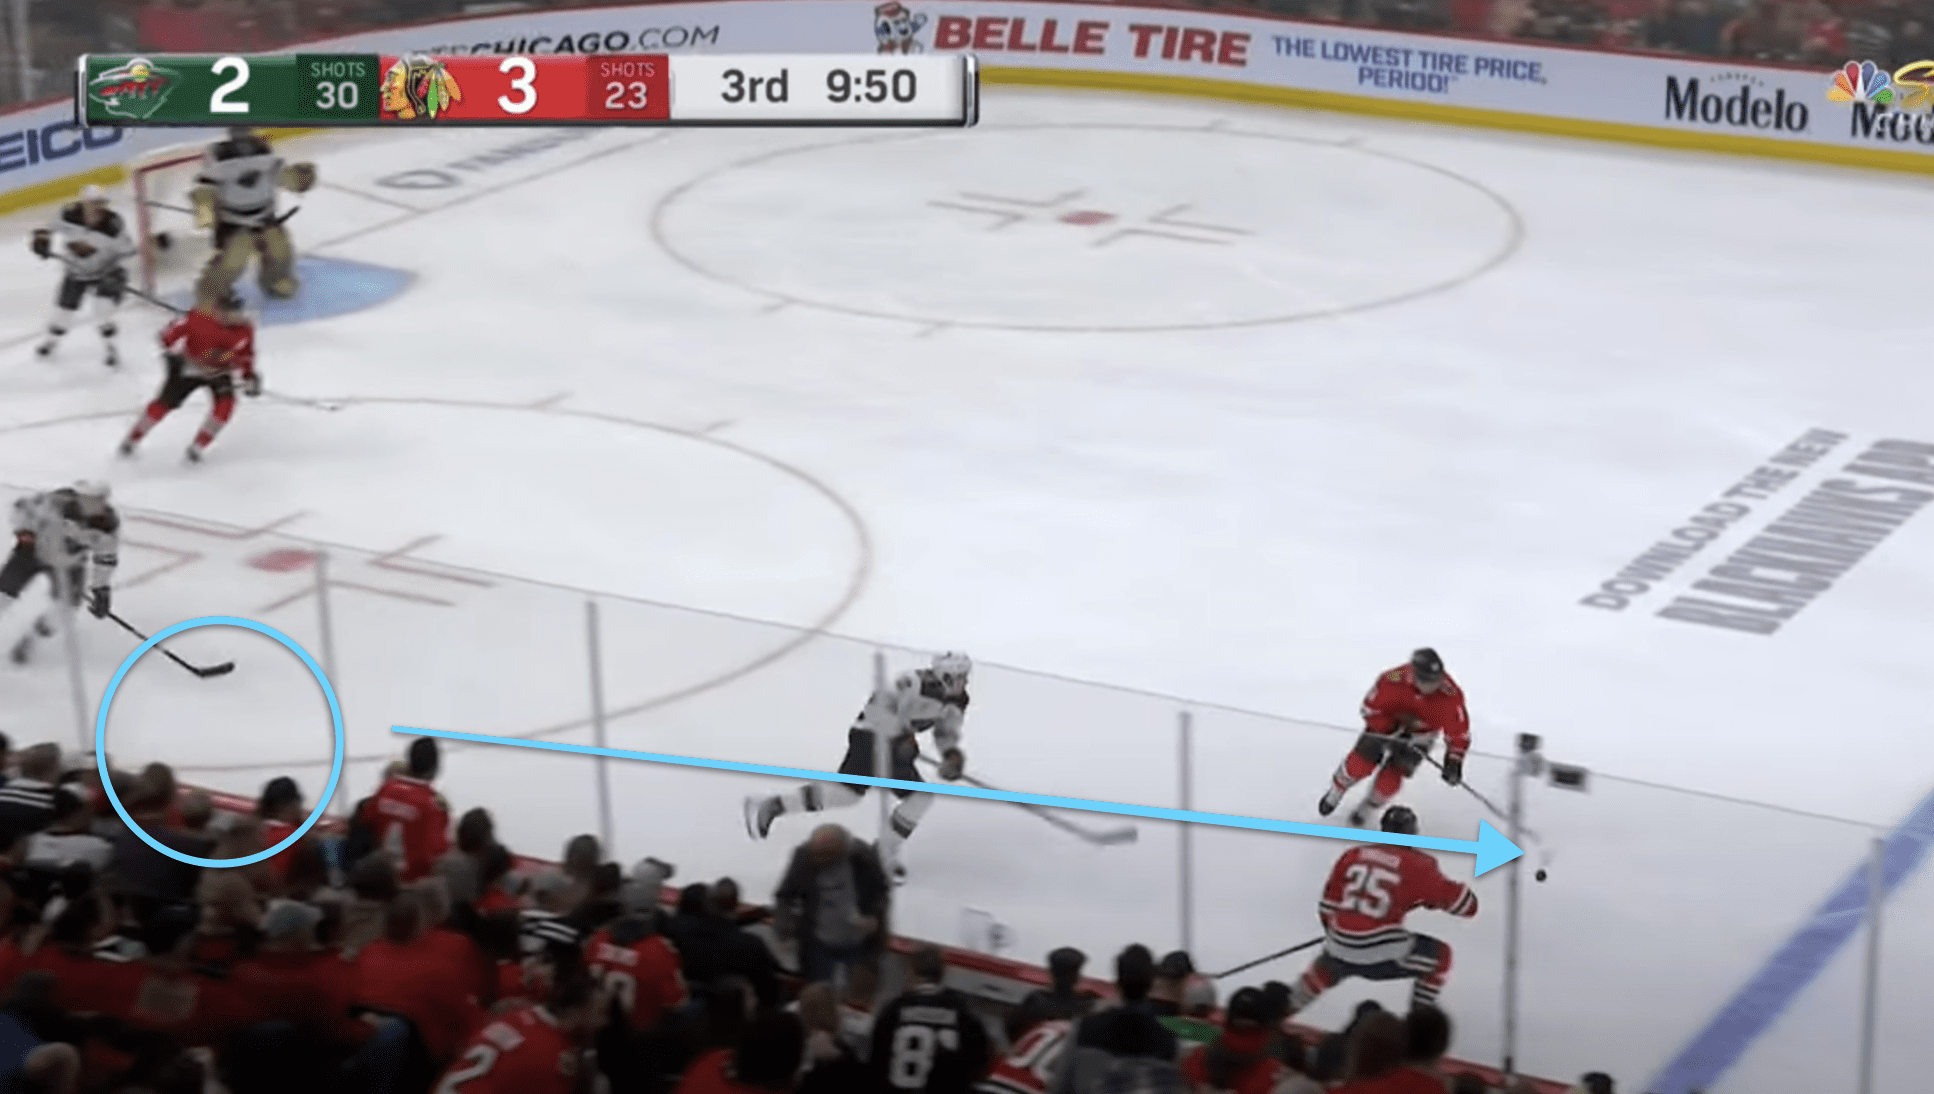
This clip starts with a center ice face-off where the Hawks maintain possession of the puck and dump it into the Wild zone. Quickly, the Hawks develop their forecheck. The puck rings around the boards, a Wild player beats the Hawks to it and moves the puck up near the blue line where two Blackhawks stand. Our blue circle below shows the turning point of what should have been an offensive zone possession for the Blackhawks. Now, instead of an offensive zone attack, the Wild are able to begin their breakout.
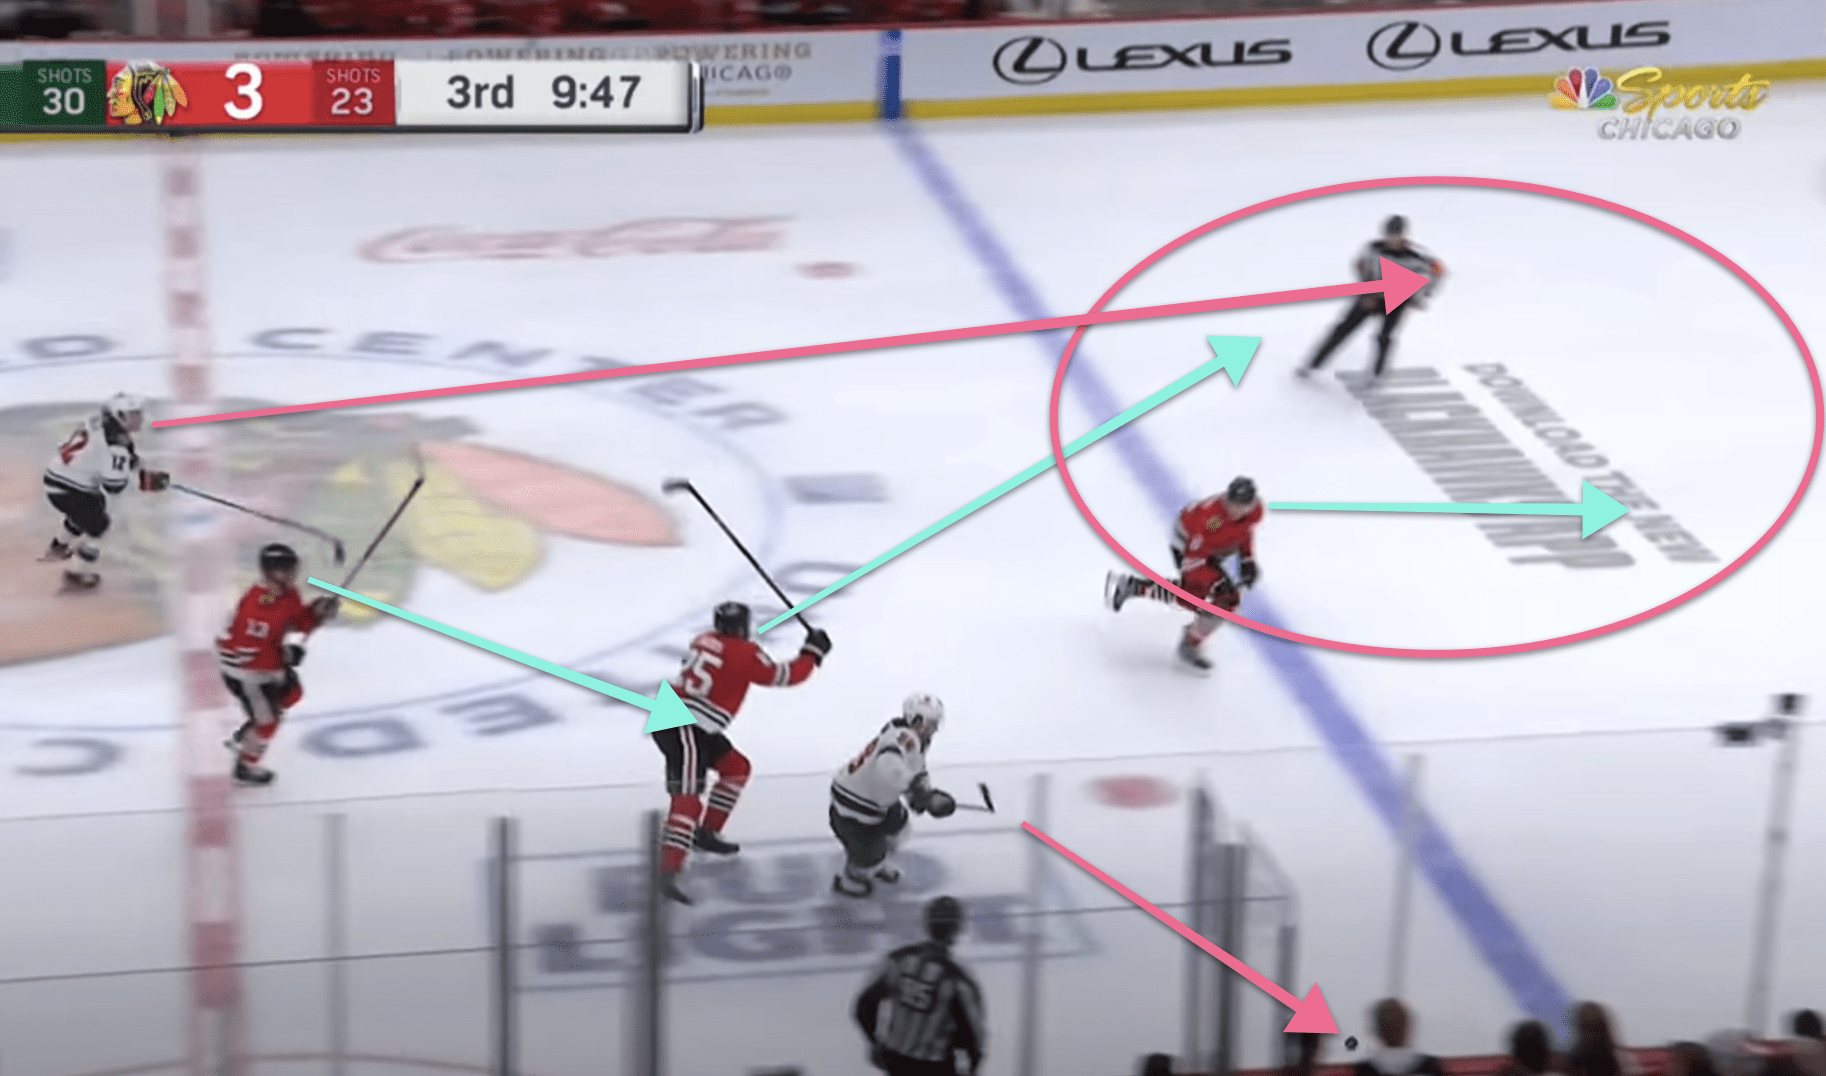
As a result of a dump in gone wrong, the direction of the play has shifted from offensive to defensive for the Blackhawks, in the blink of an eye. The Hawks attempt to push this puck towards a supporting player in the neutral zone, who is currently skating backwards. In theory, this should work well. The Hawks can quickly regain possession and begin a neutral zone transition which should create a forechecking opportunity.

Unfortunately, due to the speed and direction of play in the neutral zone, the Wild collect the puck near the Hawks blue line. As we can see here, a few things are developing.
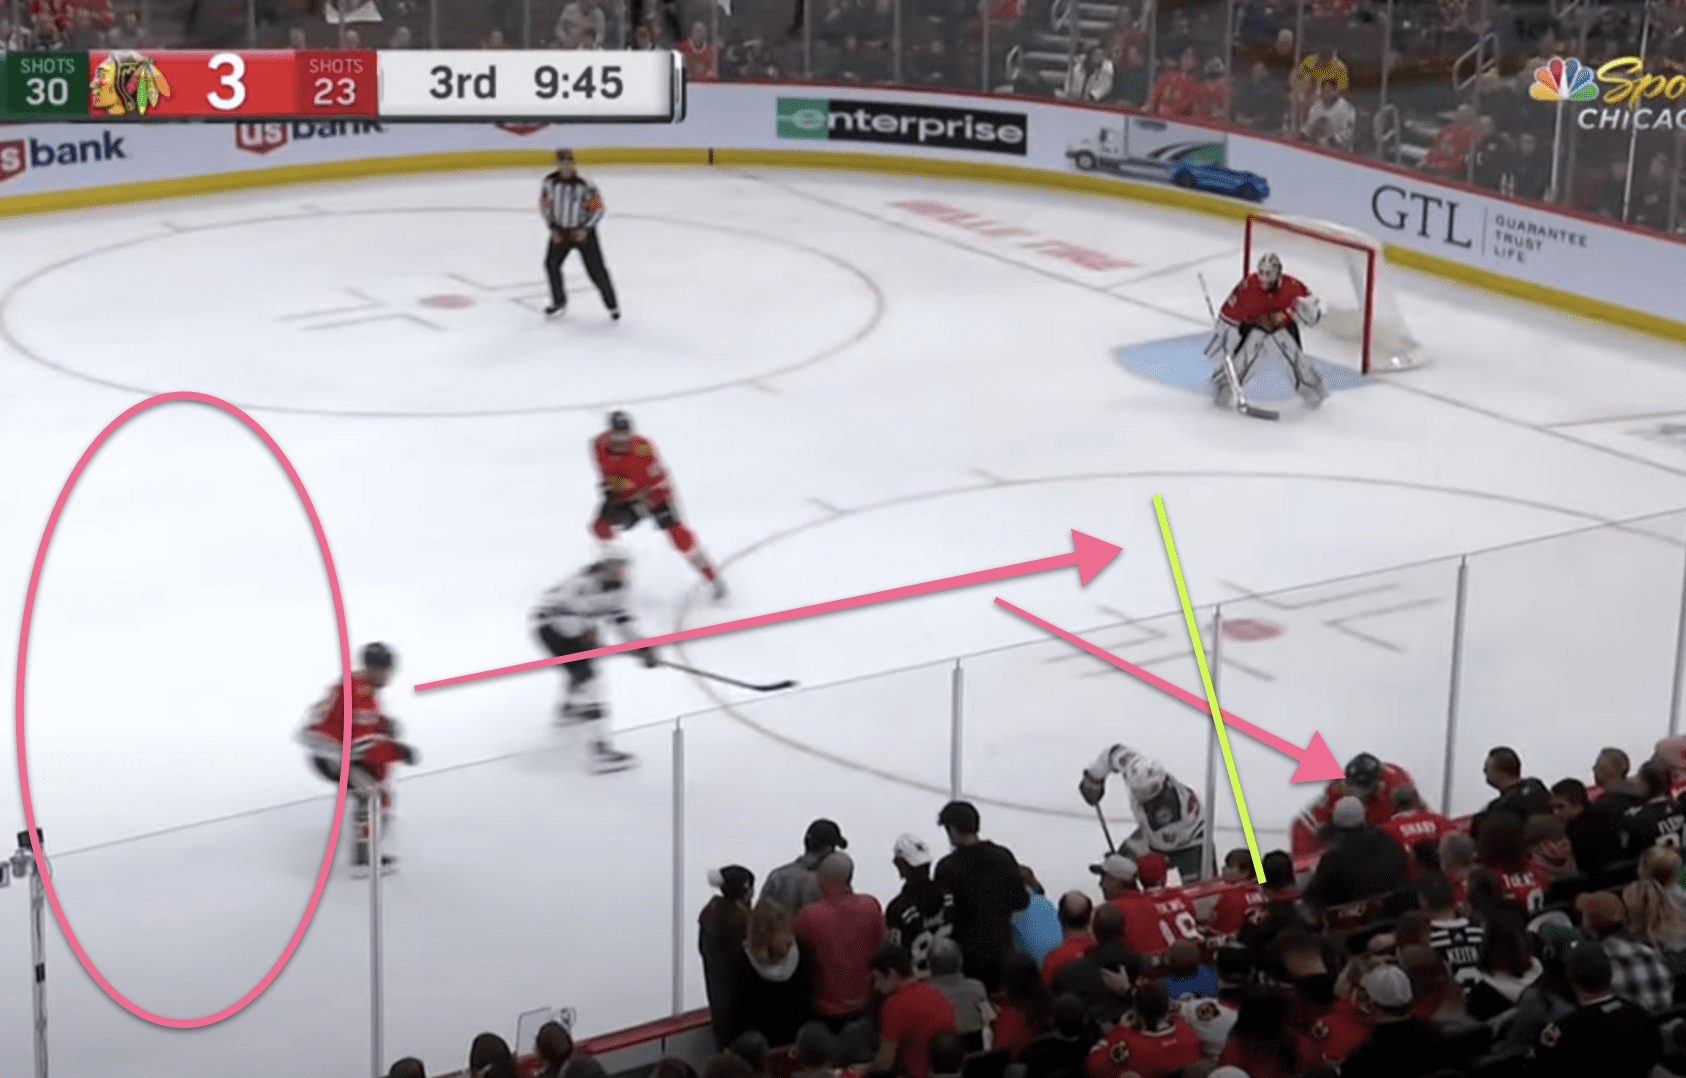
First, this poke check through the neutral zone has gone poorly. In this situation, it was the correct choice, but two critical errors (lost puck battle on the boards, overly aggressive forecheck by a defensive player without support for the Hawks) resulted in the Wild gaining puck possession. What should’ve been a quick regroup in the neutral zone has now turned into tilted ice and a forecheck for the Wild.
Caleb Jones, #25 for the Hawks, was not prepared for the puck to enter the center of the ice and the neutral zone. As a result, he’s now behind the play. Instead of attacking the Wild’s Mason Shaw, he is forced to switch positions with his defensive partner who has Shaw in front of him. Near the red line, we can see both him and Matt Boldy of the Wild moving towards the obvious open ice area of the high slot.
From the moment the puck left their offensive zone, the Hawks have been forced to chase the play. At this moment, the Wild are occupying and moving the puck from open ice area to open ice area, creating a dramatic gap in the defensive zone coverage of the Blackhawks.
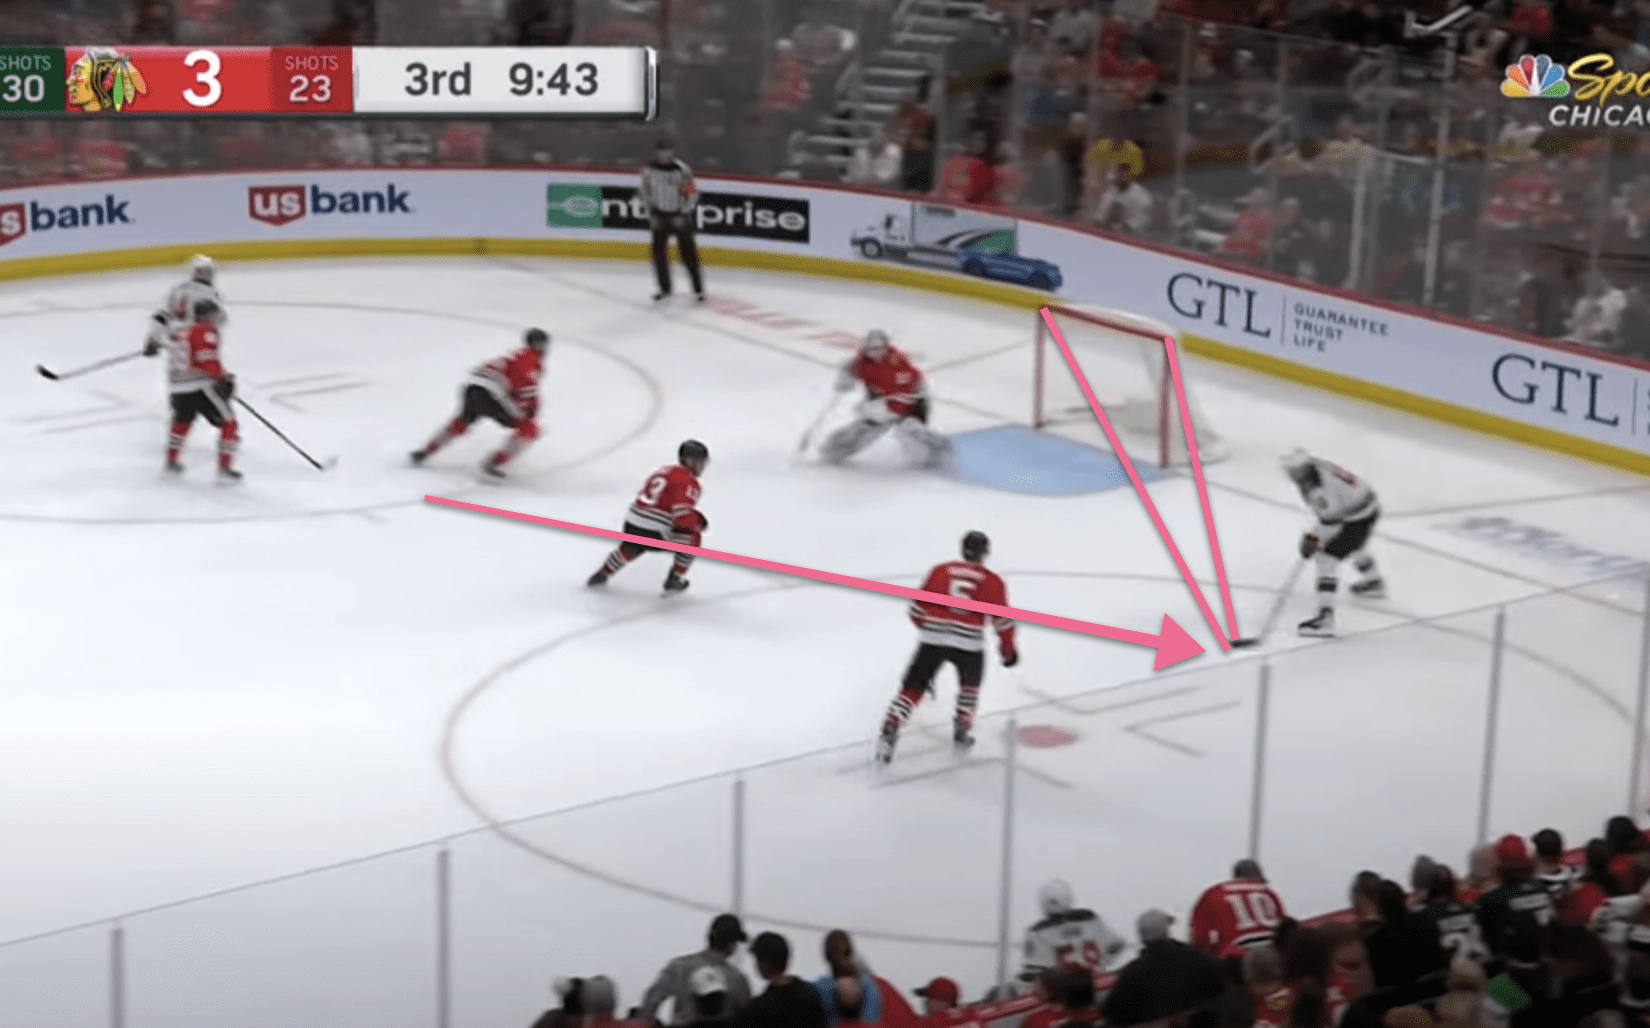
Shaw stops quickly once getting the puck, putting his body between himself and the Hawks defenseman, while every available player enters the zone. This is a great offensive zone play by Mason Shaw, as he reverses the direction of the play. Because the Blackhawks are chasing, gaps form. We can see Boldy supporting Shaw near the top of the circle, blanketed by a back checking Hawks forward.
Shaw changes the direction, moves the puck to the high slot area and because of the chasing happening, Matt Boldy is left untouched.
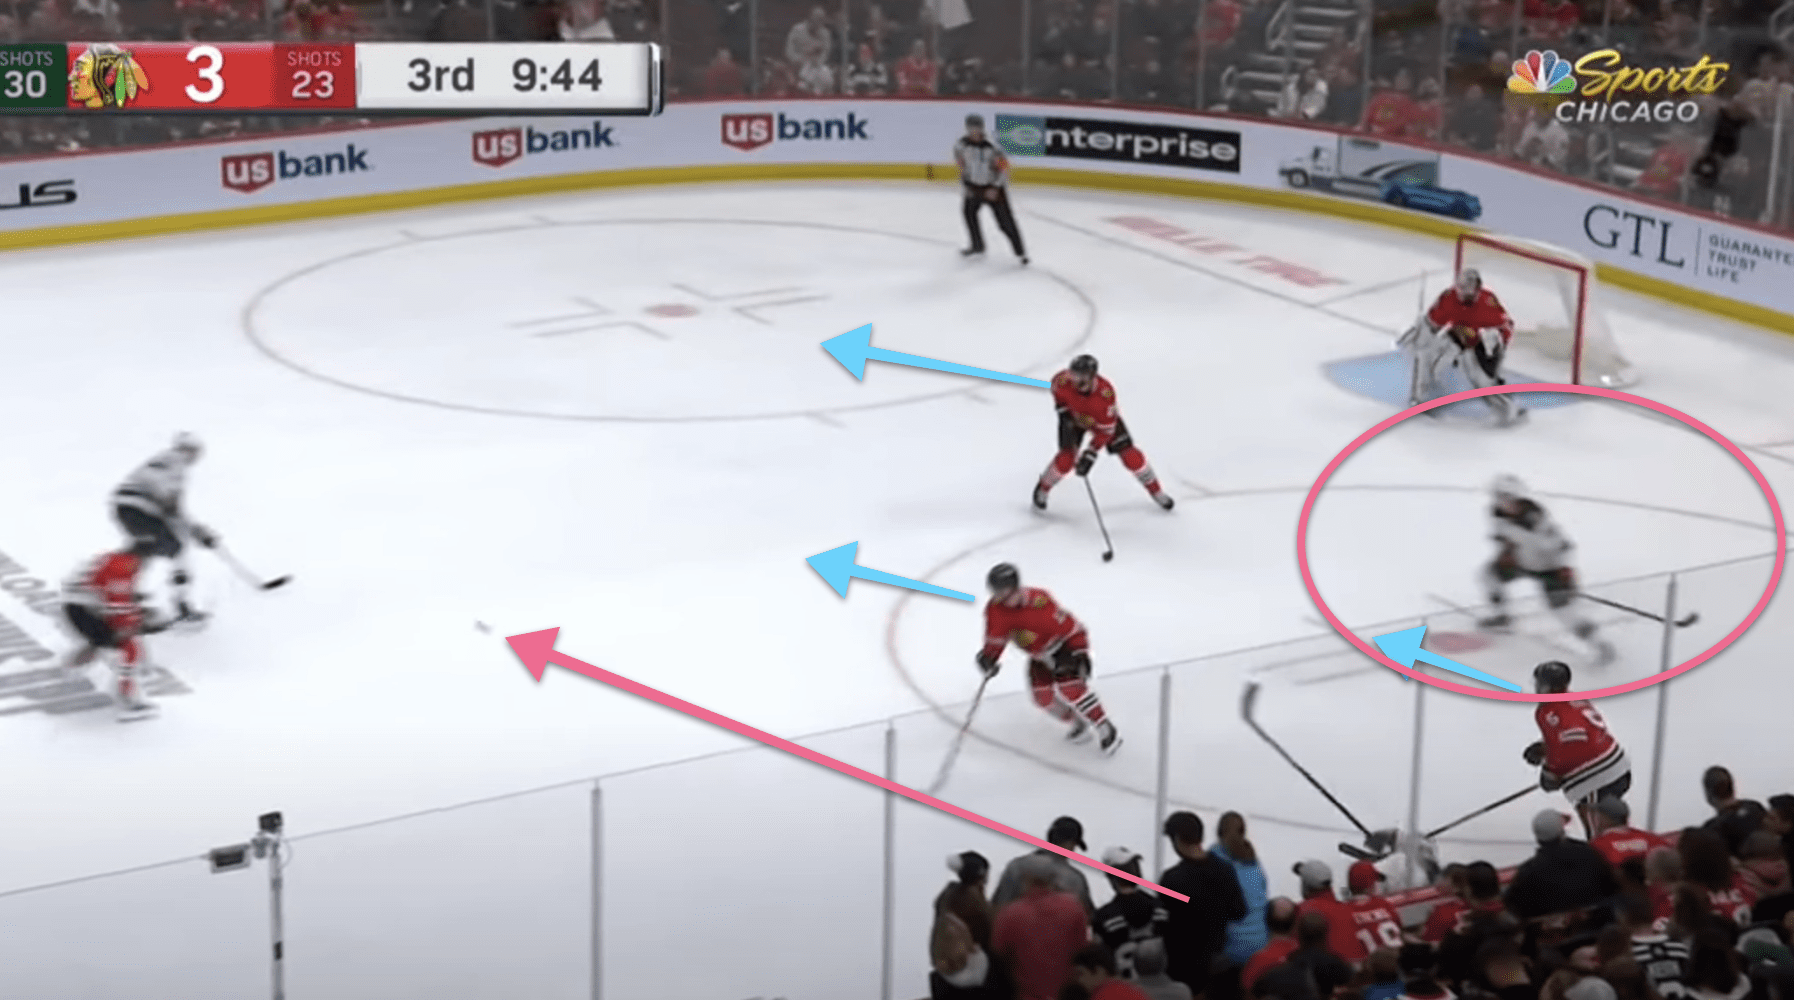
At this point, there’s just one thing left to do. Tap the puck into the open net. Which, Boldy does.
So how is this all prevented?
Neutral zone strategy is not simply play that takes place in the neutral zone. As we see in the case above, the two critical mistakes happened just prior to the puck entering the neutral zone. The neutral zone should be won prior to an offensive zone attack taking place. Defensive strategy here should dictate the play and minimize any risk of a neutral zone turnover.