There are no less than several hundred different ways to tape a hockey stick. While the amount of tape you choose to use on your stick may vary, there is always one thing that should be done the exact same way, every time, when taping a hockey stick. Each time you start to tape your stick, start from the toe of the stick, working your way back to the heel of your stick.
There are two main reasons why you should tape your hockey stick. The first is that it helps protect the blade, prolonging the life of your hockey stick. The second, and most important, is that hockey tape helps better control the puck while stick handling and shooting.
Hockey tape was developed originally to protect the stick itself, in the days of wooden blades. Since then, the tape has changed considerably, becoming less and less about protection and more and more about control. While the changes may be subtle, hockey tape has undergone a transformation as hockey stick manufacturers have started to produce sticks made only of synthetic materials.
Steps to Tape Your Hockey Stick
- Why You Should Tape Toe to Heel
- Choosing The Right Hockey Tape
- Picking a Tape Color
- Remove Old Tape and Unconformities
- Should You Use The Flat Layer Method?
- Starting At The Toe
- How To Reduce Wrinkles in Your Hockey Stick Taping
- Choosing An End Point
- Tape Settling
- To Wax or Not To Wax?
Why Hockey Sticks Should Always Be Taped Toe To Heel
The reason a hockey stick is taped from the toe of the blade to the heel of the blade is to create less friction for the puck to roll off of the stick, especially when taking a wrist shot. While it may seem like a minor detail, 100% of professional hockey players tape their sticks in this exact manner each and every time they tape their stick.
Taping your hockey stick from toe to heel isn’t just a matter of reducing friction, either. One of the other major benefits of toe to heel stick taping is that it can help shed water and ice from the blade.
Choosing The Right Hockey Tape
The right hockey tape is a matter of purely personal preference. We exclusively use Howies hockey tape, as do many professional players. The reason we use Howies was originally for it’s availability for teams. We needed tape consistently and Howies provided the tape on time for the same price as every other hockey tape distributor, so we started working with them full time.
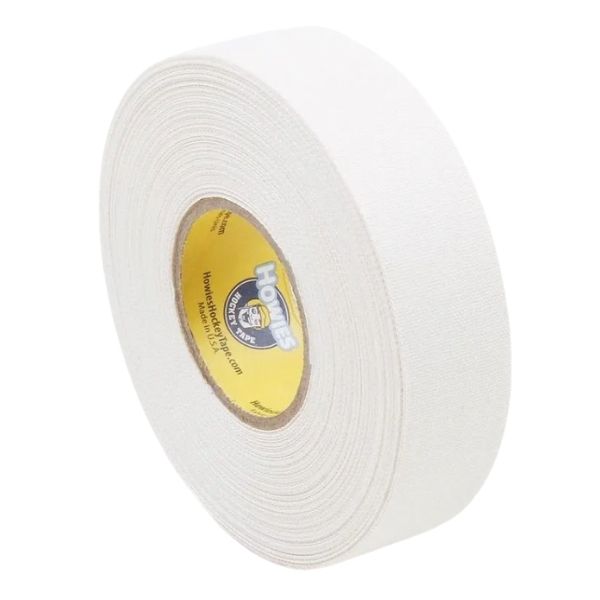
This is the hockey tape that we recommend for hockey players. It's durable and is easy to stickhandle with.
What color should my hockey tape be?
White and black are the two most popular colors of hockey tape, with each having pros and cons. White tape is said to last longer, while black tape disguises the puck better. On the other hand, for younger players, white can help them see the puck better on their stick. For many NHL players, looking for any advantage they can get, black tape is their go-to hockey tape.
Remove Old Tape and Unconformities
The most important thing to do prior to taping your hockey stick is to remove any unconformities that may be on the stick from the previous tape used. In some cases, when taping a stick that hasn’t been taped for many years, it can be a chore ensuring the blade is completely clean.
Removing old tape and any tape residue that may be stuck on the blade itself is important because it helps ensure a proper bond between the blade and the new tape you’re applying. This will help better protect the blade itself and give you better control of the puck while you’re stickhandling and shooting.
Should You Use The Flat Layer Method?
The flat layer method of taping a hockey stick is one of the most common first steps in taping the blade of your stick. To use the flat layer method of stick taping, simply lay down a flat length of hockey tape on the bottom of your blade, the length you’ll be taping your blade.
The flat layer method of taping was made popular by NHL players in the 80’s and 90’s, because it helped to better protect the bottom of their stick blade, prolonging the life of their stick. As more stick manufacturers started to transition out of manufacturing wooden hockey sticks, less and less players utilized the flat layer method.
Today, the flat layer method is used mainly by youth players looking to extend the life of their hockey tape itself, not the blade. The flat layer method of hockey stick taping can help prolong the life of your hockey tape, by creating an extra layer that the ice must wear down before cutting through the tape.
Starting At The Toe
Once you’ve removed all unconformities from the stick blade and have chosen whether or not to lay a single flat layer of hockey tape along the bottom of the stick blade, it’s time to start taping.
One of the most common problems hockey players get while taping their stick blades is wrinkles in the tape itself. An important part of reducing wrinkles in the way you tape your stick is how you start the tape job itself.
When starting to tape your stick, start by overlapping the tape in such a way that it is the same height as the rest of the blade. Then, when you’ve completed taping the entire blade, you can return to the toe area with scissors to trim up the tape overlap you’ve created.
By overlapping tape on the toe of the hockey stick, you keep the height of the tape the same throughout the entire blade, reducing wrinkles and helping to better achieve proper tape spacing.
Do you have to tape the toe of a hockey stick?
No, the toe of the stick does not have to be taped. In fact, not taping the toe can help reduce wrinkles in the tape itself. One of the main reasons the toe of a hockey stick is taped is to reduce damage to the toe and prolong the life of the stick blade. Taping the toe of your stick can also help improve overall puck control when performing certain stick handling actions, such as the “toe-drag”.
How To Reduce Wrinkles in Your Hockey Stick Taping
There are three things that must be done to reduce or eliminate wrinkles in your hockey stick taping. The first, is overlapping tape to the same height of your blade at the toe of the stick. Second, ensure completely uniform spacing throughout the blade. The third way to reduce wrinkles in your hockey stick taping is to pull the tape tightly while taping.
Wrinkles in hockey stick taping occur when the tape starts to tilt, typically in the middle of the blade. The reason this happens is that the bottom of a hockey stick blade is not completely flat. To prevent this, ensure that you’re utilizing the same exact spacing while pulling tape tightly throughout the entire blade.
Choosing An End Point
The end point of your tape is purely personal preference. While it has previously been popular to tape the blade of the stick to the heel or slightly beyond, it’s a sign of the past.
Today, it’s more likely that you’ll break your hockey stick at the shaft than it is the blade. With this in mind, experiment with your stick taping. The hockey stick is taped to improve puck control, not to prolong the life of the stick like it was in the 80’s, 90’s, 00’s and even in the past 6-7 years.
Hockey Stick Taping Examples
There are hundreds of different ways to tape your hockey stick. Thousands, even. Below, we’re demonstrating some of the ways our favorite NHL hockey players tape their sticks, as well as some of the more interesting and popular stick taping examples we’ve used.
Tape Settling
Once you’ve finished the taping, there are three options. First, do nothing. Use the tape as it is. The second, is to use a puck to help settle the tape. The third, is wax. Technically, there is a fourth, which involves settling and waxing.
Settling hockey tape using a hockey puck. The reason players rub a hockey puck on the blade of their stick after taping is to improve the bond between the tape and the blade of the stick. This also helps to reduce the amount of water the tape absorbs throughout gameplay.
The preferred method of post tape blade care is to use a hockey puck to settle the tape and improve its bond, followed by waxing the blade of the stick itself.
To Wax or Not To Wax?
Waxing is one of the most important parts of hockey stick taping. Using wax helps to repel water, which reduces the weight of the blade throughout a game or practice, while improving puck grip for improved stick handling and puck control.
If you are interested in more hockey how-to’s, check out our post on how to lace and tie hockey skates by clicking the link!
Conclusion
That wraps up this post on how to tape a hockey stick. The best way is to start by choosing the right tape for the twig, start at the heel and make your way to the toe. If you’d like to tape the toe you can 100% do that, otherwise, you are good to go. You can add wax to put additional life to your stick tape job, but it’s not a requirement. Thank you for reading and good luck!